

Two parts
Clean your wheels in 7 steps, then swap them in 9 steps.
Products
Atom Star, Hyper and Spectra.
Tools
Wheel brush, tyre brush, sponge, pressure washer, jack, wheel wrench and torque wrench.
Before you start
Clean wheels last longer. You also spot damage straight away.

Watch: clean your wheels
Clean rim and tyre step by step, see which products you need and how to remove dirt, brake dust and other deposits.
Clean wheels last longer
Part 1: Wash your wheels
Prefer text to video? Here is the whole wash, step by step, so your summer wheels are clean and ready for storage.

Step 1 of 7
Spray on wheel cleaner
Spray Atom Star over the whole rim, front and back. It turns purple as it dissolves brake dust and iron fallout. Let it work for 4 to 5 minutes.

Step 2 of 7
Rinse
Rinse the rim with a pressure washer, the back too. Don’t brush yet: the coarse dirt has to go first, or it can scratch the rim.

Step 3 of 7
Repeat and brush
Apply wheel cleaner once more. Work between the spokes with a wheel brush and use a sponge on larger surfaces. Turn the wheel and do the same on the back.

Step 4 of 7
Remove tar and road grime
Spray Hyper over the rim. The gel sticks even to wet surfaces and dissolves tar and road grime. Let it work for a minute, brush, then rinse with a pressure washer.

Step 5 of 7
Apply alkaline degreaser
Apply Spectra to the whole tyre and rim. It takes organic dirt such as insects, pollen and bird droppings.

Step 6 of 7
Scrub the tyre
Scrub the sidewall with a tyre brush, front and back. If it turns brown, that is the dirt coming off. Let it work for a minute after brushing.

Step 7 of 7
Rinse and done
Rinse the whole wheel thoroughly and let it dry before storage. Now it is ready to be put away, and nicer to bring out in spring.
Know the requirements
Rules in Norway
Winter tyres need at least 3 mm tread depth and summer tyres at least 1.6 mm. Studded tyres are allowed from 1 November to the first Sunday after Easter Monday, and from 16 October to 30 April in Nordland, Troms and Finnmark.
Source: Statens vegvesen. Always check the current rules.

Watch: change your wheels
How to lift the car safely, take off and fit the wheels, and check tread depth and tyre condition.
Step by step
Part 2: Change your wheels
Time for winter wheels? Everything you need to think about, from taking off the summer wheels and checking the tyres to fitting the winter wheels correctly and safely.
Step 1 of 9
Find the lifting point
Place the jack at the car’s reinforced lifting point, often marked with an arrow on the sill. Not sure? Check the owner’s manual. Lift until the wheel is off the ground.

Step 2 of 9
Loosen the bolts
Loosen the wheel bolts with the right socket, using an impact wrench, cross wrench or breaker bar. Wear ear protection with an impact wrench. Take off the wheel.

Step 3 of 9
Measure and inspect the tyres
Measure on the inside, middle and outside. A big difference can mean the car needs a wheel alignment. Also look for dry cracks on the sidewall.

Step 4 of 9
Mark and store
Write the wheel’s position on the inside with a tyre pen, for example FL for front left, so you can rotate the tyres for more even wear. Store clean, dry wheels somewhere cool and dark, never in direct sunlight.

Step 5 of 9
Clean the wheel arch
Make the most of the wheel being off. Spray Hyper in the wheel arch, let it work for 10 to 15 minutes and rinse. Follow up with Spectra for whatever is left.

Step 6 of 9
Inspect brakes and wheel arch
Check the brake disc, brake pads, inner liner and boots. Look for leaks and rust. With a clean wheel arch you can clearly see if anything needs fixing.

Step 7 of 9
Check the winter tyres
Measure the tread depth and check that the balance weights are still in place. Set the tyre pressure according to the owner’s manual, it often changes during storage. The wrong pressure means a longer braking distance.

Step 8 of 9
Fit and tighten crosswise
Screw in all bolts by hand first so the threads are not damaged. Then tighten lightly crosswise: one bolt, then the one opposite, and so on around the wheel.

Step 9 of 9
Torque and re-tighten
Lower the car and tighten the bolts crosswise with a torque wrench to the torque in the owner’s manual. Re-tighten after 50 to 100 km.
Products in this guide
Everything used above, in one place.


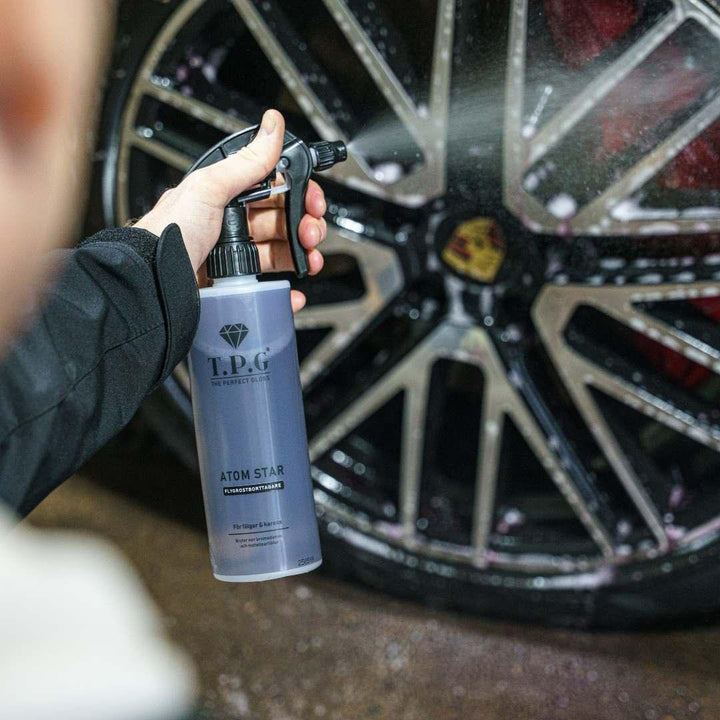
Atom Star Fälgrent & Flygrostborttagning


Spectra Alkalisk Gelavfettning
More guides

